- Home
- Products
-
-
Uncover bespoke, high-yield cryptocurrency mining solutions for various applications, fortified by our expertise and commitment to precision and reliability.

Discover top-tier mining hardware for varied uses, backed by our profound understanding and commitment to excellence.

-
- News
- Contact Us
- Miner Profitability
- Support
 EN
EN
Description
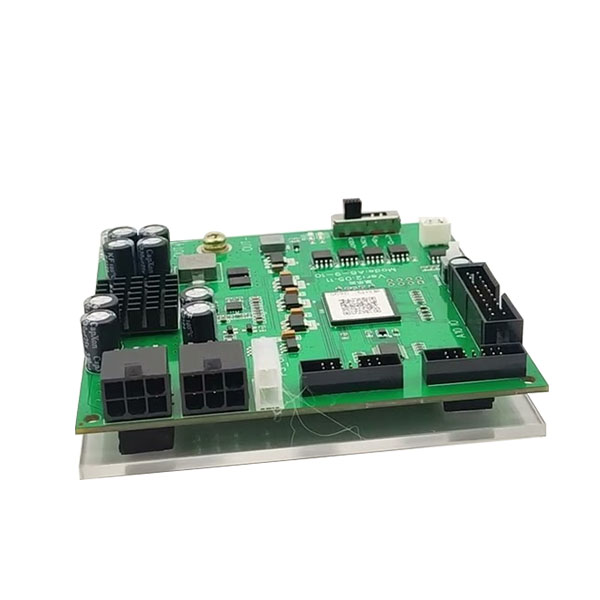
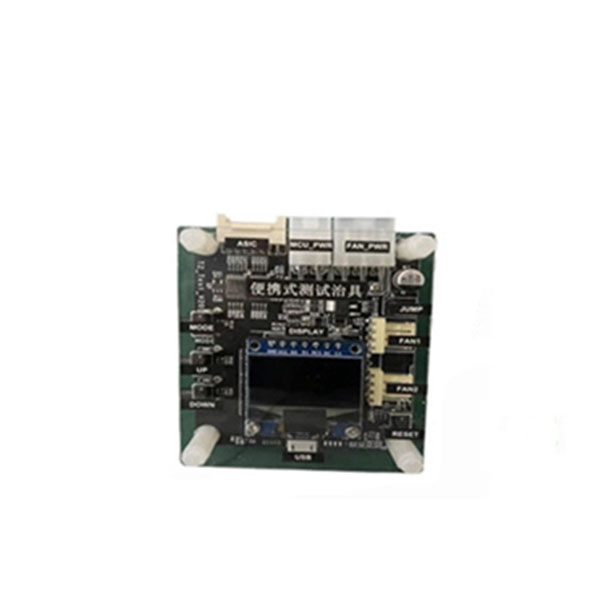
Avalon 8 9 10 test fixture / Avalon tester for A8 series / Avalon test stand
Avalon 8/9/10 Series Test Stand For testing Avalon miner A821 A841 A851 A852; A920 A921; A910 A911; A1066 A1047 (Note: A1066Pro cannot be tested with this fixture) hash board ASIC chip status, Help us find which area is the ASIC chip damage and find the problem more intuitively can fix the hash board accurately and quickly.
Please read the following introduction carefully before using this jig. Improper operation can easily cause the jig and hash board to burn out.
- White LED light: Indicates whether there is an output power supply; if the light is on, it means there is the output voltage, and if the light is not on, it means there is no output voltage.
- OUT+ (red clip): output positive, there are two voltages 10V and 12V, how much voltage is output is controlled by the mode switch. A8* and A9* series are both 10V output, and A10* series are 12V output; before the clip is connected to the board, be sure to confirm whether the model and model switch is switched correctly. OUT- (black clip): negative output pole.
- LED2 (green LED): Indicates that the board has passed the test and no maintenance is required.
- LED1 (red LED): indicates that the test board is not good and needs to be repaired; the specific problem still depends on the LOG, and some problems can be ignored.
- Gear switch: a total of 4 gears, the main output voltage is controlled by this switch.
The gear models are:First gear A841: A821 / A841 / A851 / A852
Second gear A920: A920 / A921
Third gear A911: A910 / A911
Fourth gear A10: A10 series (Note: A1066Pro cannot be tested with this fixture)
- White 2PIN interface, serial output of the first and second gears, pin 11 is GND (black cable), and pin 12 is RX (white cable).
- Yellow 2PIN interface, serial output of the third and fourth gears, pin 9 is GND (black cable), and pin 10 is RX (white cable).
- A10 IO: A10* data cable interface, connected to A10* data cable interface of hash board.
- Self-locking switch: Press this switch when you want to maintain and check the signal, the board signal (for example, the C signal will have a high level of one chip and a low level of the chip) will be output regularly, which is more convenient when measuring signals; normal test board When it is good or bad, this switch should be turned on, otherwise there will be no output from the serial port.
- A8-9 IO: The first and second gear data cable interface, connected to the A8*-A920/A921 hash board data cable interface after passing through the adapter board and the cable.
- A911 IO: The data cable interface of the third gear is connected to the data cable interface of the A910/A911 hash board after passing through the adapter board and the cable.
- PS_ON: Connected to the foot switch, press it to supply power immediately, release it to power off immediately. It is recommended that the continuous pressing time does not exceed 3 seconds. When the continuous pressing time reaches 6 seconds, the fixture will also automatically power off to prevent the hash board from overheating.
- IN(12V): The 12V output from the PC power supply is connected here to supply power to the fixture, and both interfaces must be connected well.
- Adapter board: A8*-A9* universal adapter board for cables, connected to the jig, and connected to the hash board via 2*7 cables. (Note: the colored side of the cable is connected to the first pin of the hash board)
Steps:
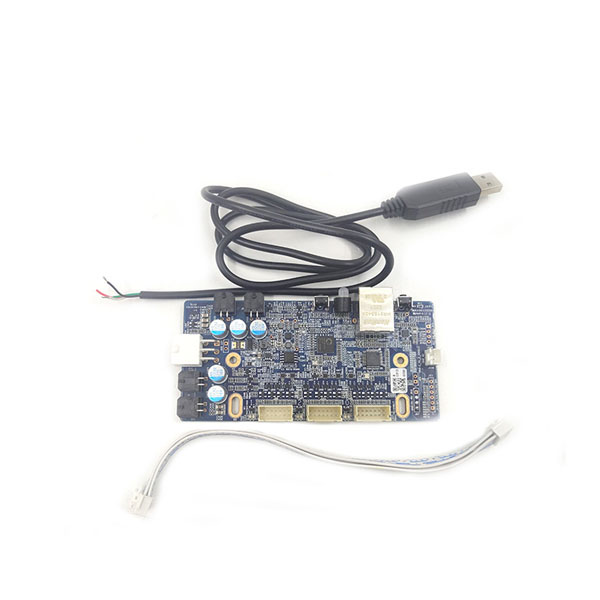
- The USB to the serial port is connected to the computer, and the fixture end is connected to the white or yellow interface according to the gear.
- Open the software to install the serial port driver; if it has been installed, you can ignore this step.
- Open the serial port software, select the corresponding COM* for the serial port number (you can view the serial port number in the device manager), and select the baud rate as 115200.
- Turn the switch to the corresponding position according to the model.
- The 6PIN output of the PC end is connected to the input port of the fixture.
- Connect the foot switch interface to PS_ON, and put the switch on the ground to control the power supply with a foot pedal.
- Connect the cable to the fixture according to the model.
- Connect the output power supply to the power supply of the hash board, first connect – and then +. (Note: If the positive and negative poles are reversed, it is easy to burn the jig and hash board)
- Connect the cable to the cable interface of the hash board. (According to experience, this step must be connected before stepping on the electricity)
- Step on the foot switch; the test result will be displayed in 2 seconds, one red/green LED will light up, and there will also be a Log display on the serial port software. After the test result comes out, release the foot switch (it is recommended that the continuous pressing time does not exceed 3 Seconds, when the jig is pressed continuously for 6 seconds, it will also automatically power off to prevent the hash board from overheating).
Problems that can easily lead to burning fixtures:
- The gear switch must be the correct model.
- The connection between the jig and the board must be correct, and cannot be misplaced or reversed.
- The board to be tested cannot have abnormal short circuit, and the main power supply can be measured with a multimeter; A10: Is the resistance value of the 6 data signals (DI, RI, CI, DO, RO.CO) of the data interface abnormal; A8-9 : Is the resistance value of 6 data signals (DI, RI, CI, DO, RO.CO) and 2 power supply (1.8V, 12V) of the data interface abnormal.
If your preferred payment method is Offline Payment or Wire Transfer, please get in contact with CryptohashMiners team via email or online chat so we can assist you further with the order placement.
Offline Payment
USDT
TRC20: Address① TL646SQSZZGNmm2PWAAniUacWYr7UmfjCL ; ERC20: Address① 0x98c1d80b7cfeef89cb51a5323362dcf2a7a924a2 ; Address② 0x01344681c9E0A16569a516D61adc42B382064405 BTC: Address① 1ET62sVJm8Mzhx2J7PUpp5DEAdWzU8L25r ; Address② 131LTewQmCqxfaTmny919jSJUhLpKbQ9Vd ETH: Address① 0x98c1d80b7cfeef89cb51a5323362dcf2a7a924a2 ; Address② 0x01344681c9E0A16569a516D61adc42B382064405 Bank Payment Name: Aladdin supply chain management (hk) limited Bank Name: China CITIC bank international limited Bank Account: 774202722401 SWIFT CODE : KWHKHKHH Bank code: 018 Shipment Please read all terms of shipment and payment before placing your order. CryptohashMiners has two warehouses, Shenzhen warehouse and Hong Kong warehouse. Our orders will be shipped from one of these two warehouses. All mining products include postage; some products do not include postage, such as miner parts, immersion cooling system and mobile mining, if you need to place an order please contact us to account for your shipping costs. 1 – Packaging details: carton packing / per unit 2 – Worldwide delivery(Customer Request Acceptable): UPS, DHL, FedEx, EMS, TNT and Special Express Line (double-clear tax lines and door-to-door service for countries such as Thailand and Russia) 3 – Port: Shenzhen / Hong Kong 4 – Lead time: in 7 days after payment Note: If you have any questions about the logistics information, please contact us immediately. We will track your shipment and get back to you as soon as possible.SHIPPING COMPANY ESTIMATED DELIVERY TIME PROCESSING TIME Fedex 3-7 days 3~7 business days UPS 4-8 days TNT 3-8 days DHL 3-7 days EMS 5-15 days DPEX 3-6 days Aramex 3-9 days Russia Express-SPSR 14-25days
Refund
All items are non-refundable and orders not cancelable. (Except in the increase in mining machine prices due to the fluctuation of prices or in the case of out of stock)
Warranty
Warranty Limitations
We offer no warranty for pre-installed software, its quality, performance, functionality, or compatibility for a particular purpose. We do not warrant that the functions contained in the software will meet specific requirements or that the operation of the software will be uninterrupted or error-free. The product is sold “as is”.
To the extent permitted by applicable law, this warranty does not apply to:
- normal wear and tear;
- damage resulting from accident, abuse, misuse, neglect, improper handling or improper installation;
- damage or loss of the product caused by undue physical or electrical stress, including but not limited to moisture, corrosive environments, high voltage surges, extreme temperatures, shipping, or abnormal working conditions;
- damage or loss of the product caused by acts of nature including, but not limited to, floods, storms, fires, and earthquakes;
- damage caused by operator error, or non-compliance with instructions as set out in accompanying documentation;
- alterations by persons other than us, associated partners or authorized service facilities;
- products, on which the original software has been replaced or modified by persons other than us, associated partners or authorized service facilities;
- counterfeit products;
- damage or loss of data due to interoperability with current and/or future versions of operating system, software and/or hardware;
- damage or loss of data caused by improper usage and behavior which is not recommended and/or permitted in the product documentation;
- failure of the product caused by usage of the products not supplied by us;
- hash boards or chips are burnt.
Warranty Service
During the warranty period, we will undertake to repair, or based on our sole discretion, to replace a defective product by an identical or similar (e.g. newer) version of the product, unless the defect was the result of Warranty limitations.
The costs incurred in connection with the return of the product, part, or component to our service processing facility shall be carried by the product owner. If the product, part, or component is returned uninsured, you assume all risks of loss or damage during shipment.
Warranty Period for GTX Graphic Card series
- A three-month warranty is provided for all products under GTX Graphic Card series when used for mining.
- A three-year warranty is provided for all products under GTX Graphic Card series when used for gaming.
Warranty Period for all Miners
- The warranty period for brand new machines is 6 months
- No warranty period for used machines
- Antminer S19 series machine warranty period is 1 year
Note:
1 — Transportation costs and all other costs (if any) pertaining to the return of a product shall be under the sole responsibility of the purchaser.
2 — The period of repair shall depend on the type of problems encountered.


 Bitcoin
  Ethereum
  Dogecoin
  Zcash
Zcash  Litecoin
  Ethereum Classic
  Dash
Dash  Alephium